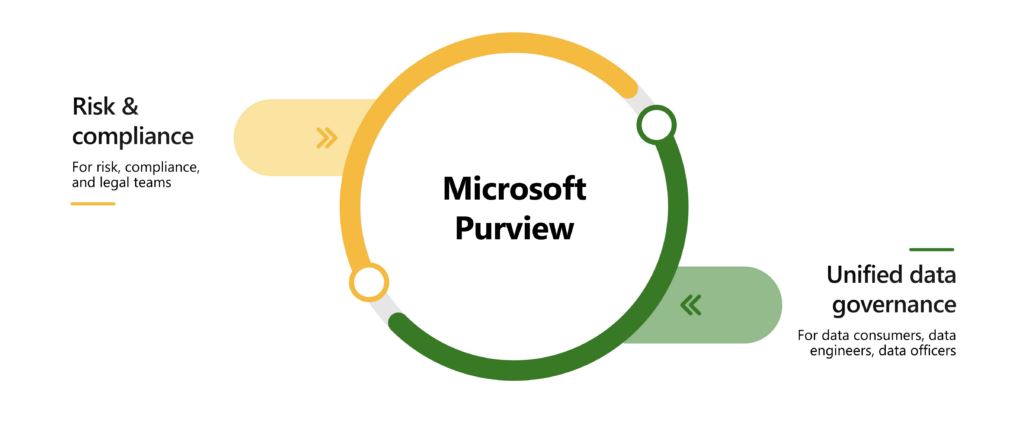
Office 365 Purview is an advanced service provided by Microsoft that is part of the broader ecosystem of Office 365 and Azure services. This technology is designed to help organizations better understand, manage, and protect their data within cloud and hybrid environments. Purview offers a wide range of features and tools that enable organizations to gain a thorough overview of their data and perform effective management and protection.
Data protection
File tagging is the process of assigning attributes or labels to files to identify their content, significance, or importance. This process enables organizations to better manage their data, search for and organize it more easily, and apply various security measures and access rules. File tagging can be performed manually by users or automated using artificial intelligence and machine learning technologies.
There are several reasons why organizations use file tagging:
- Facilitating data management and organization: File tagging allows organizations to better organize their data and search for it more easily. For example, users can tag files by topic, project, or category, which helps them find the information they need more quickly.
- Improving data security: File labeling allows organizations to identify sensitive data and apply appropriate security measures to it. For example, files containing personal data or financial information can be labeled as sensitive and protected with encryption or access restrictions.
- Compliance with regulations and standards: Many industries have strict data protection regulations and standards, such as the GDPR in Europe or HIPAA in the U.S. healthcare sector. File labeling enables organizations to comply with these regulations and standards by identifying and managing sensitive data in accordance with their requirements.
- Analysis and reporting: File tagging enables organizations to perform analysis and reporting on their data. For example, they can track how data is used, who has access to it, and what its properties and characteristics are.
There are several technologies and approaches to file labeling:
- Manual labeling: Users can manually assign tags or attributes to individual files based on their content, significance, or importance. This approach is time-consuming and depends on the thoroughness and consistency of users.
- Automatic tagging: Using artificial intelligence and machine learning technologies, the file tagging process can be automated. These technologies can analyze file content and automatically assign tags based on various criteria, such as topic identification, detection of sensitive information, or language identification.
- Policy-based tagging: Organizations can define policies for file tagging based on specific rules and conditions. For example, they can set rules for tagging files containing a specific keyword or pattern.
- Integration with other systems: File tagging can be integrated with other systems and tools, such as identity and access management or content management systems. This allows organizations to better manage and protect their data within a broader information environment.
Overall, file tagging is an important tool for managing and protecting data within organizations. It provides organizations with the ability to better organize their data, improve security, and comply with data protection regulations and standards. The use of artificial intelligence and machine learning technologies can further streamline the labeling process and reduce the costs and effort associated with manual file labeling.
Implementing File Tagging
In the Office admin interface, select the "Compliance" option. This option allows you to configure security policies for information stored in the cloud environment. To configure file tagging, select the "Information Protection" option, where you can create tags for the relevant data.
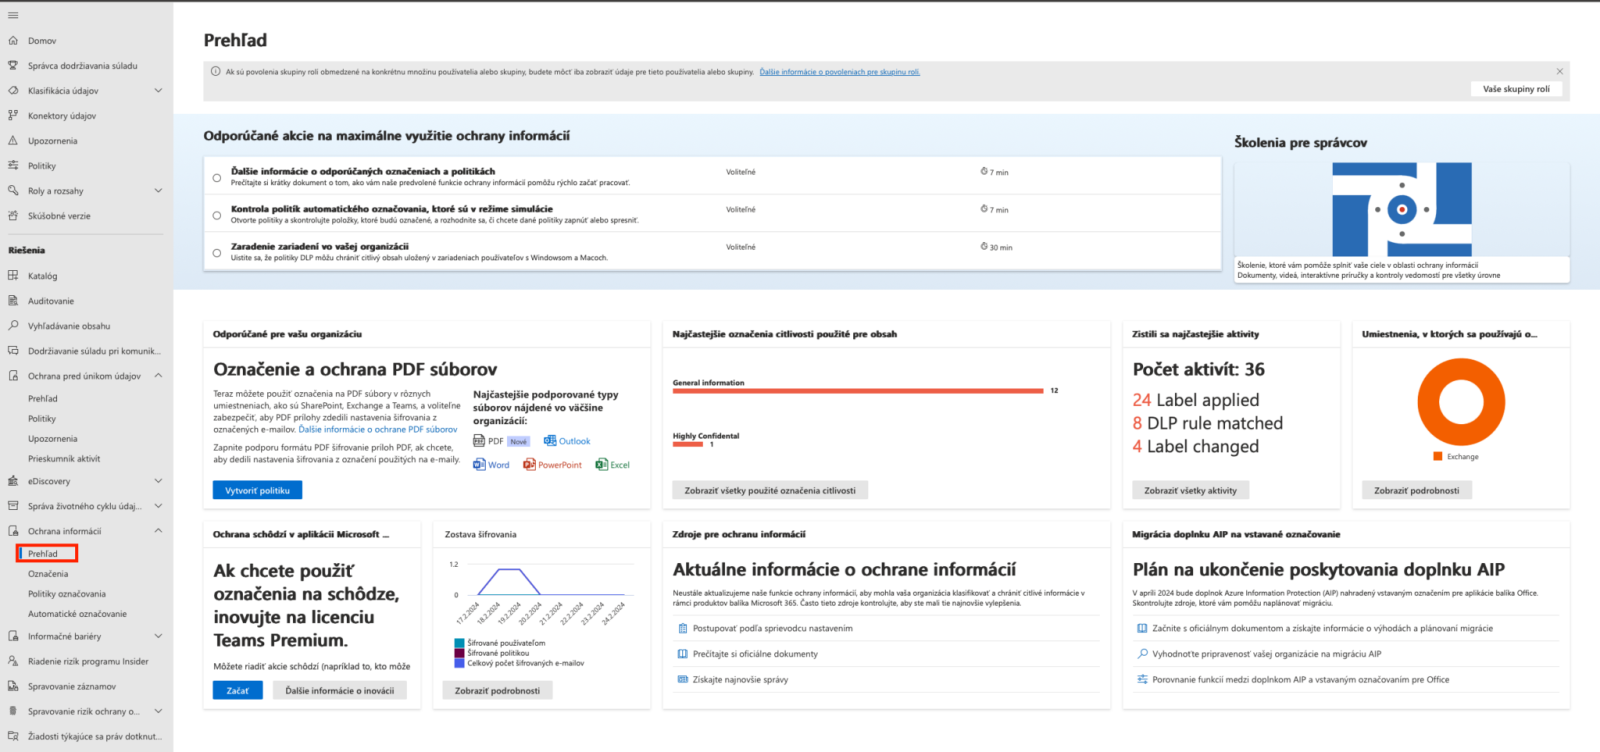
The "Overview" section displays the current status of implemented policies and shows how many tags have been applied. In the "Tagging" section, you can create custom tags.
.png)
The figure shows the data categorization structure, divided into four categories, with each category containing a different type of file. Creating a custom category involves defining the security level as well as the actions to be performed after a document is tagged.
.png)
To create a group, you must define the required names for that group. The group's priority is automatically set to the highest level, and you can change this priority after creation.
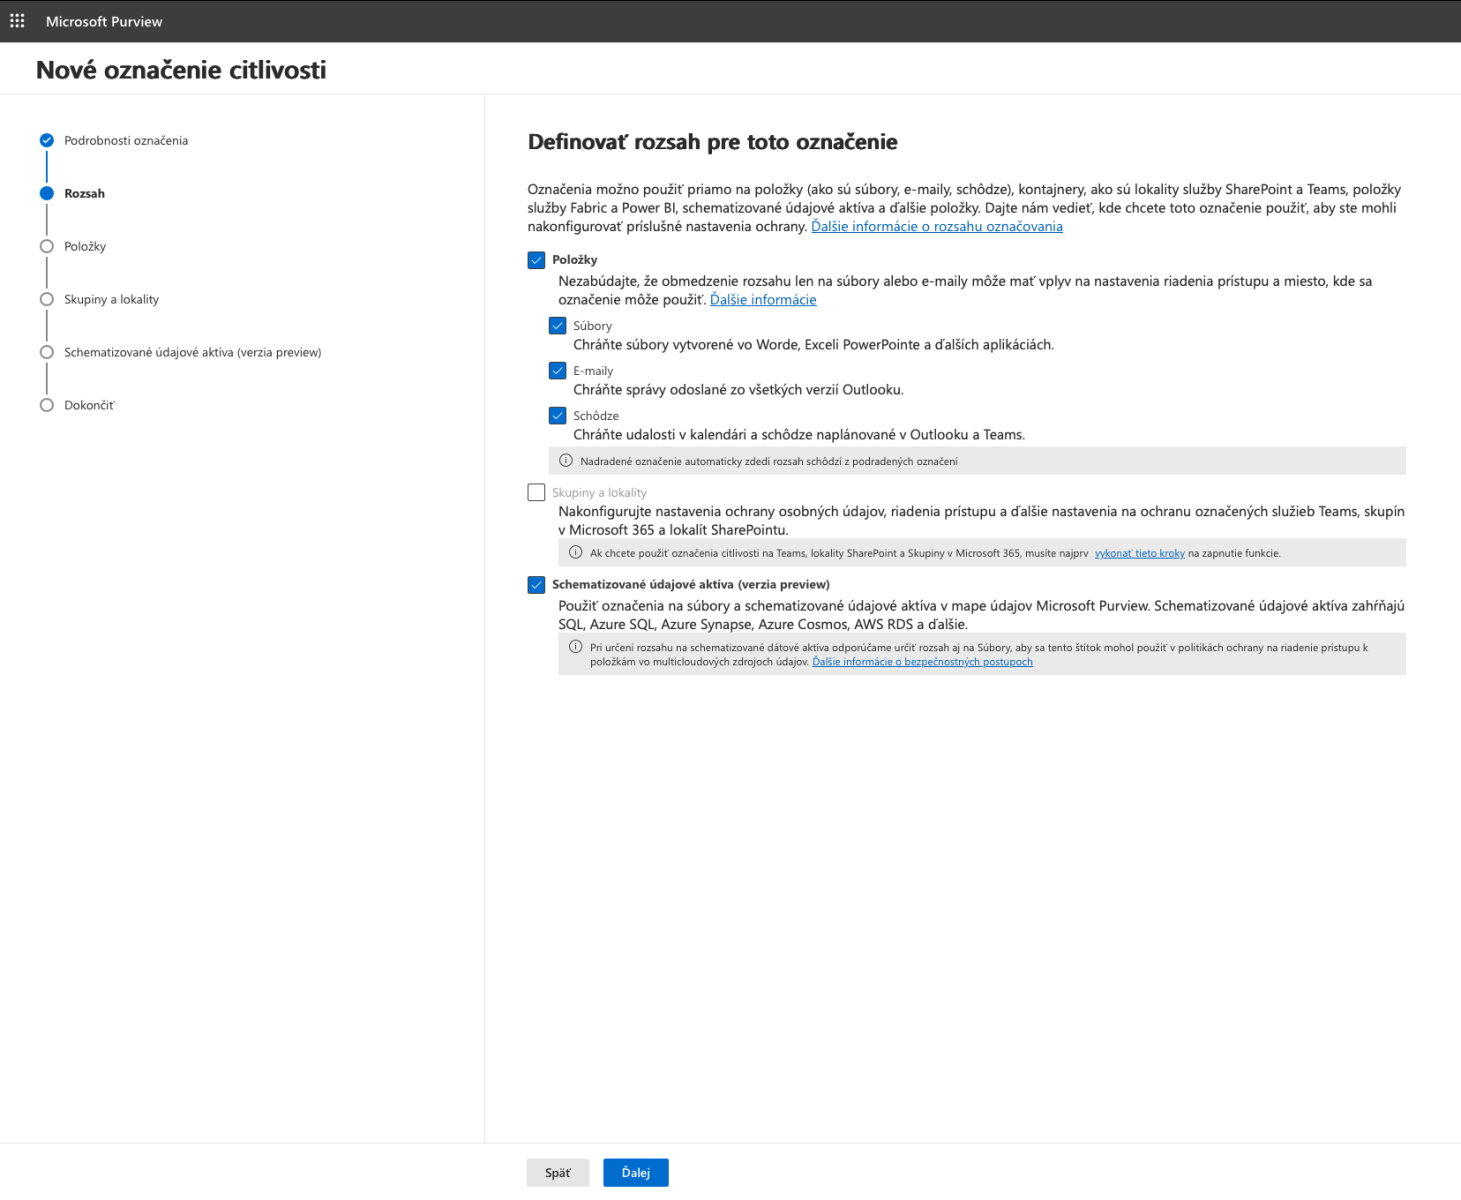
You can specify multiple options for the types of resources to which the policy should apply. You can select files, emails, and meetings. It is recommended to apply the policy to all of these options where data is shared.
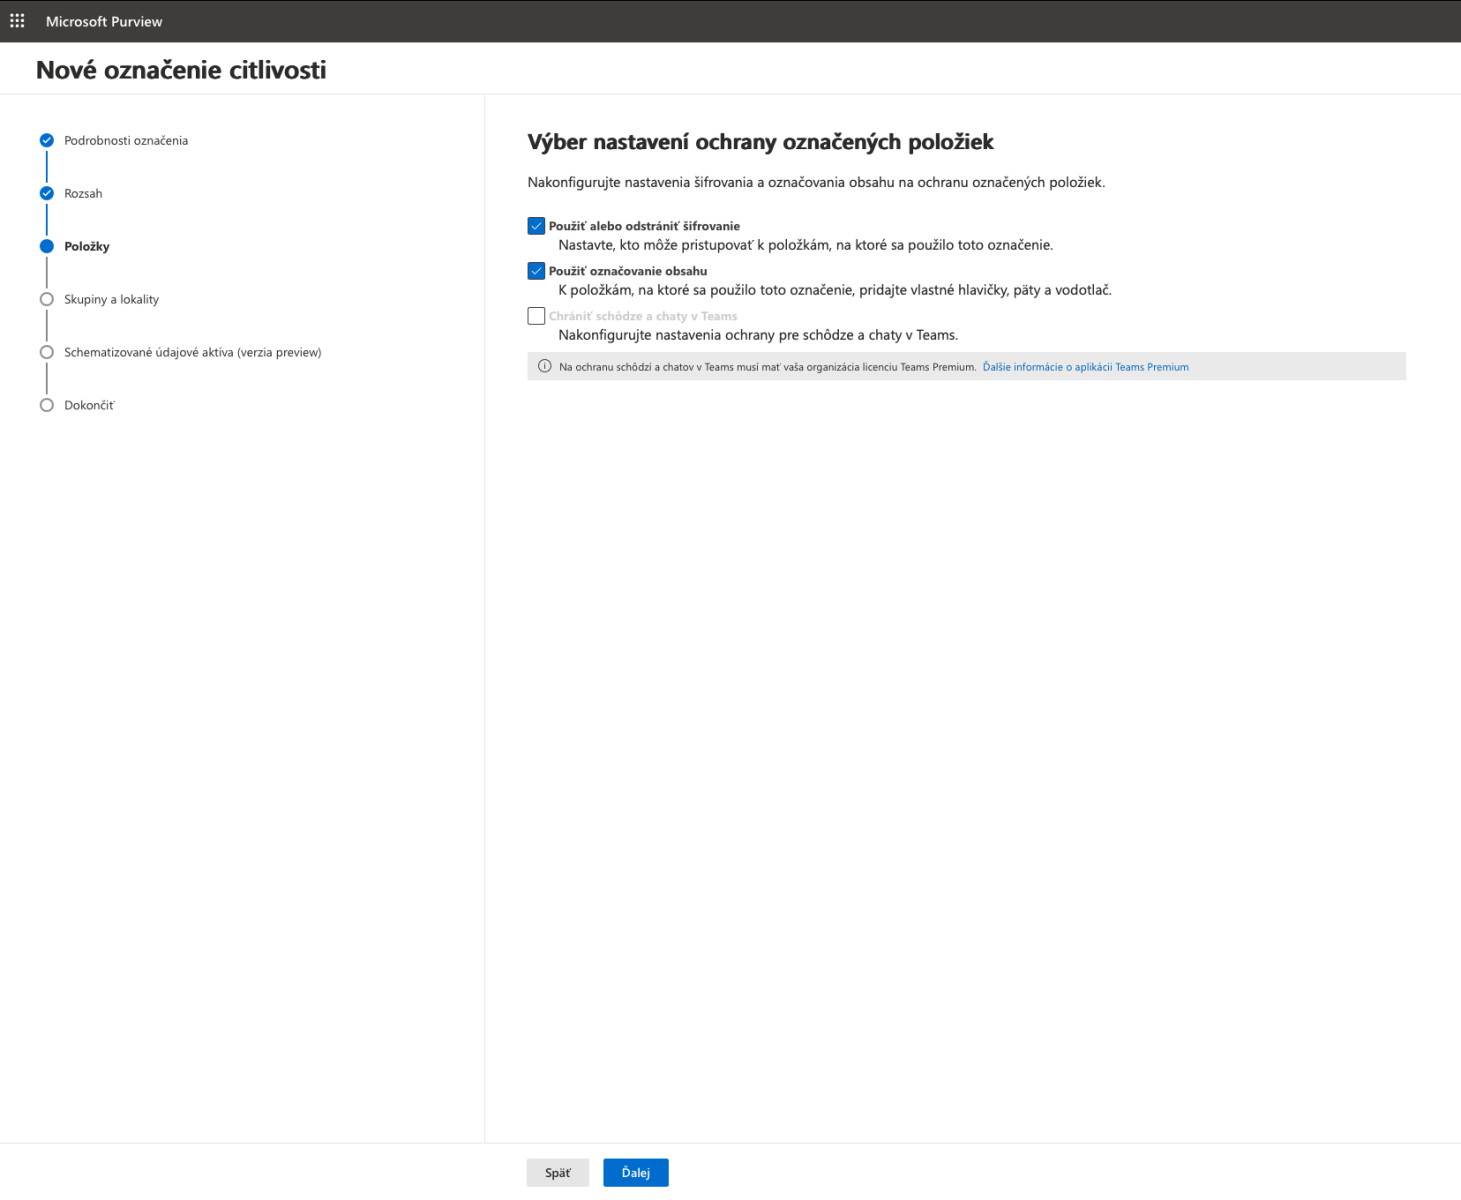
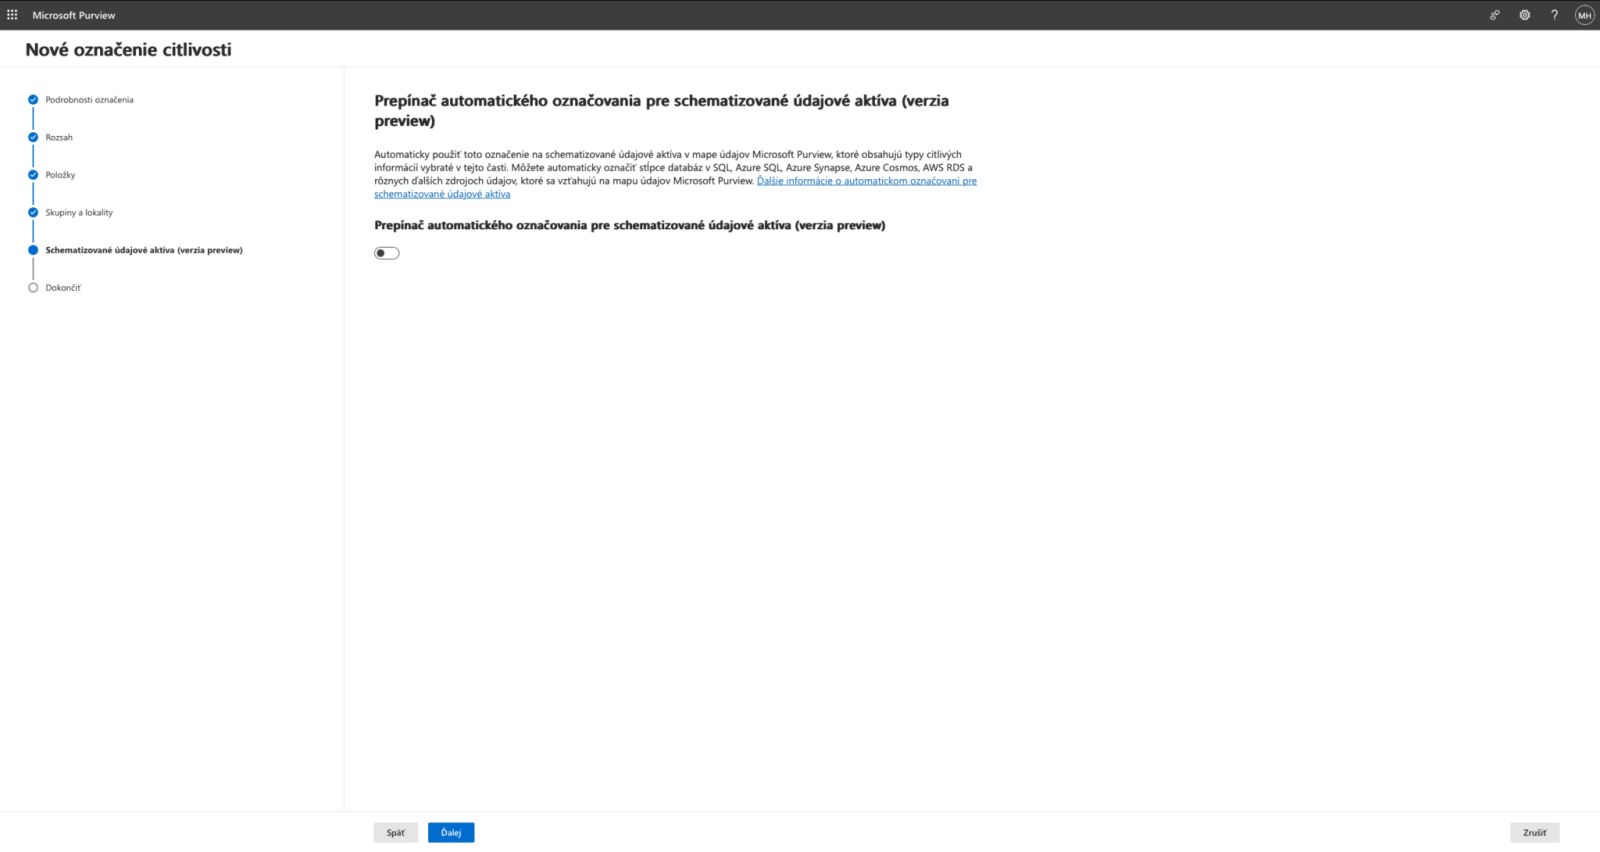
In the next section, you can specify what actions should be taken with the tagged information. You can enable encryption for specific files, and you can also configure the file tags if selected tags are detected in a given file.
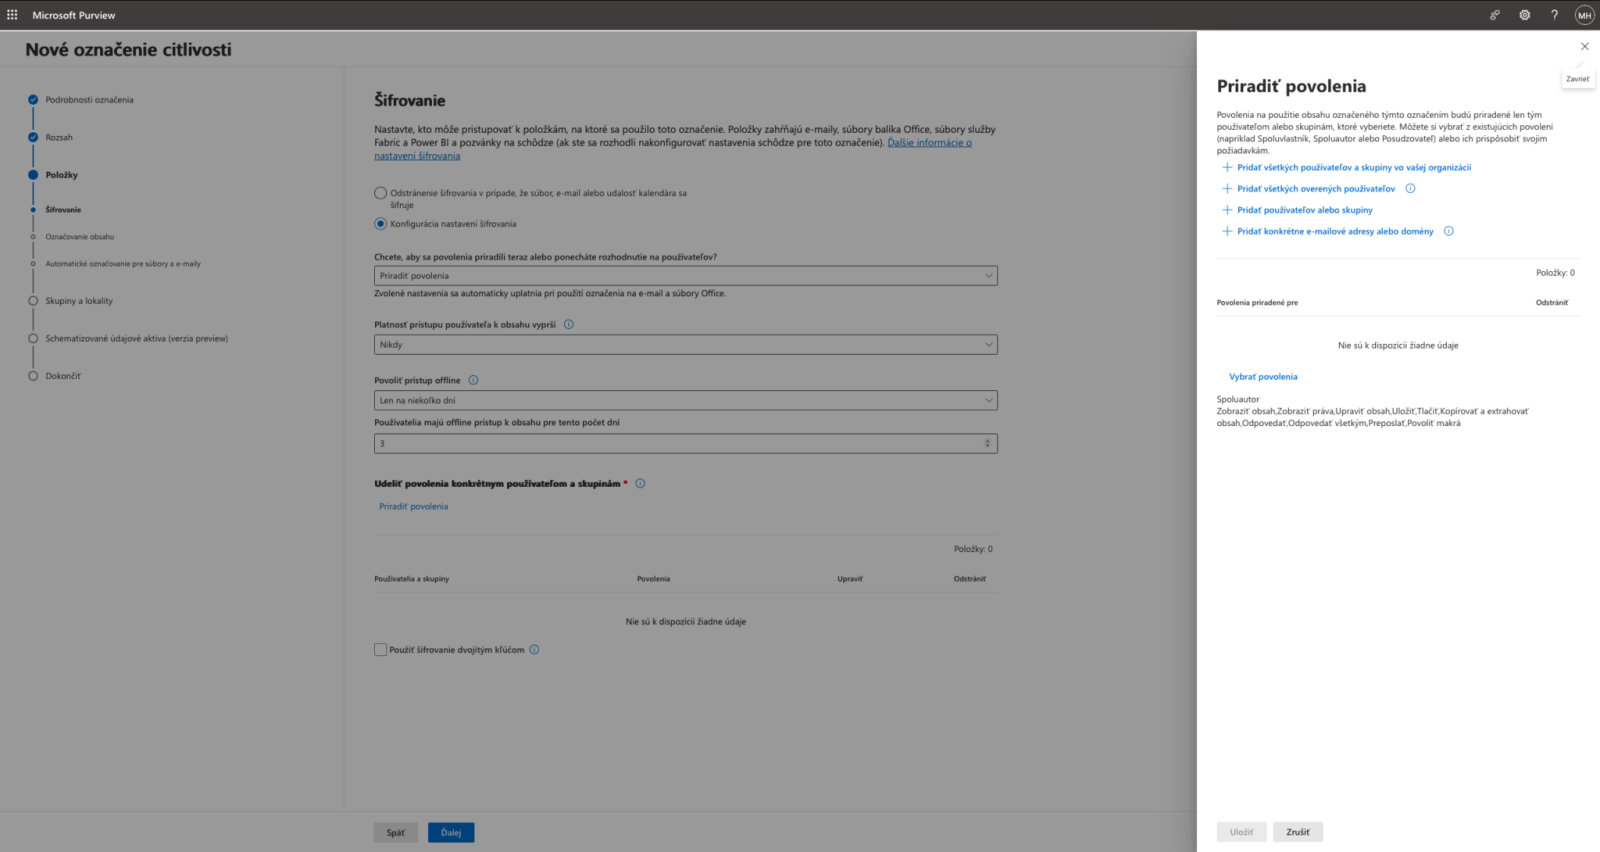
You can force the encryption feature to turn on automatically. You can also choose from several options for granting access permissions to files.
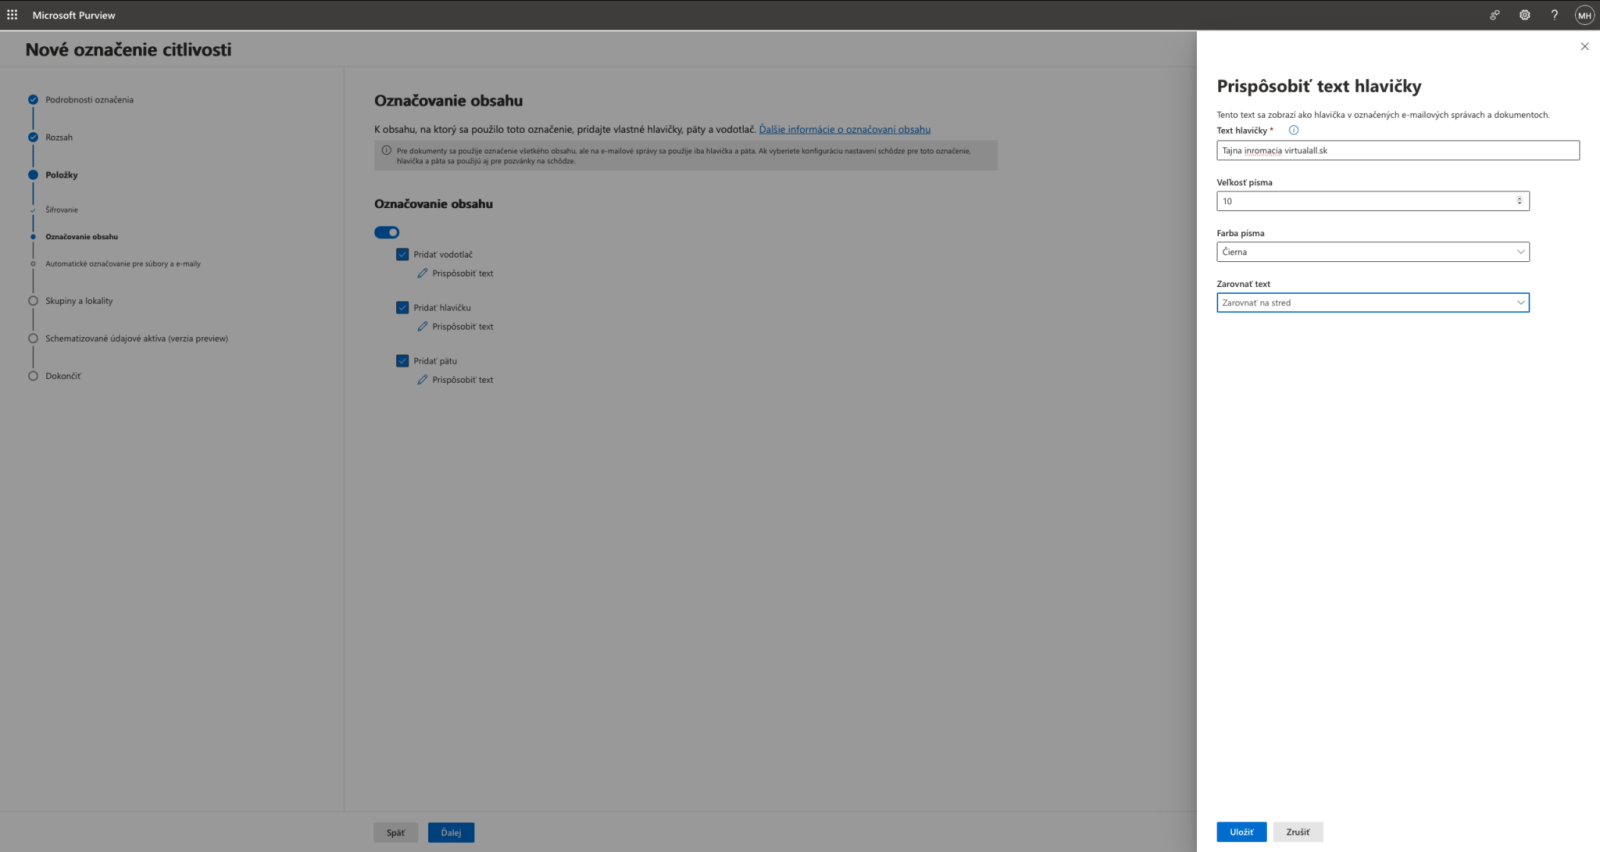
With this option, you can add a custom header or footer to your data and emails, or apply a watermark to the entire document. We recommend adding your company name and a notice indicating that the data is sensitive.
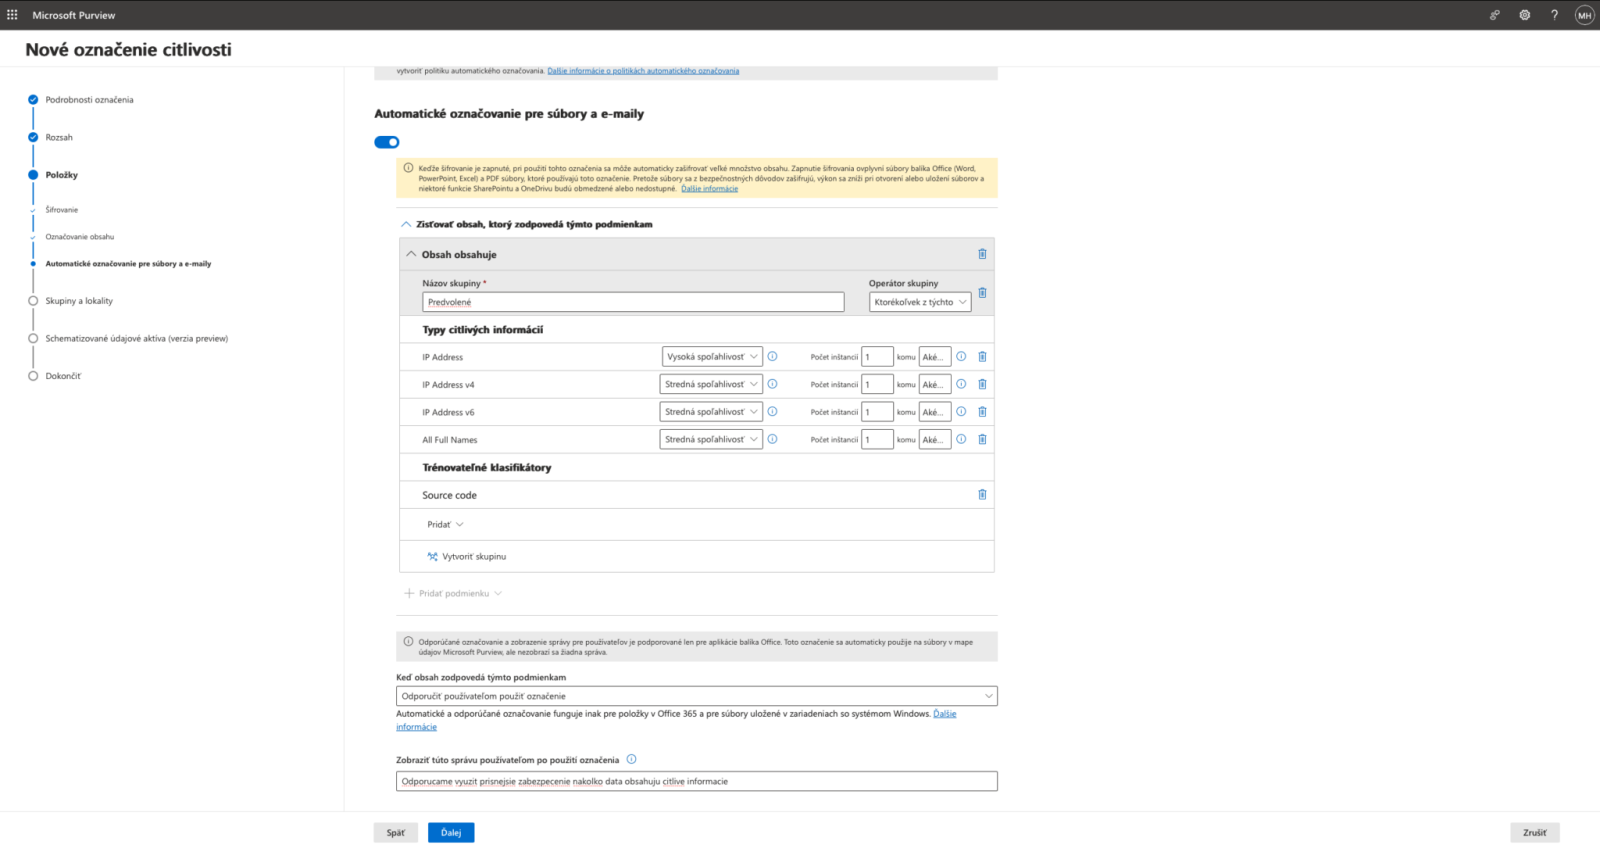
To speed up the saving process, you can define rules that recommend or automatically apply security labels to users based on the nature of their data.
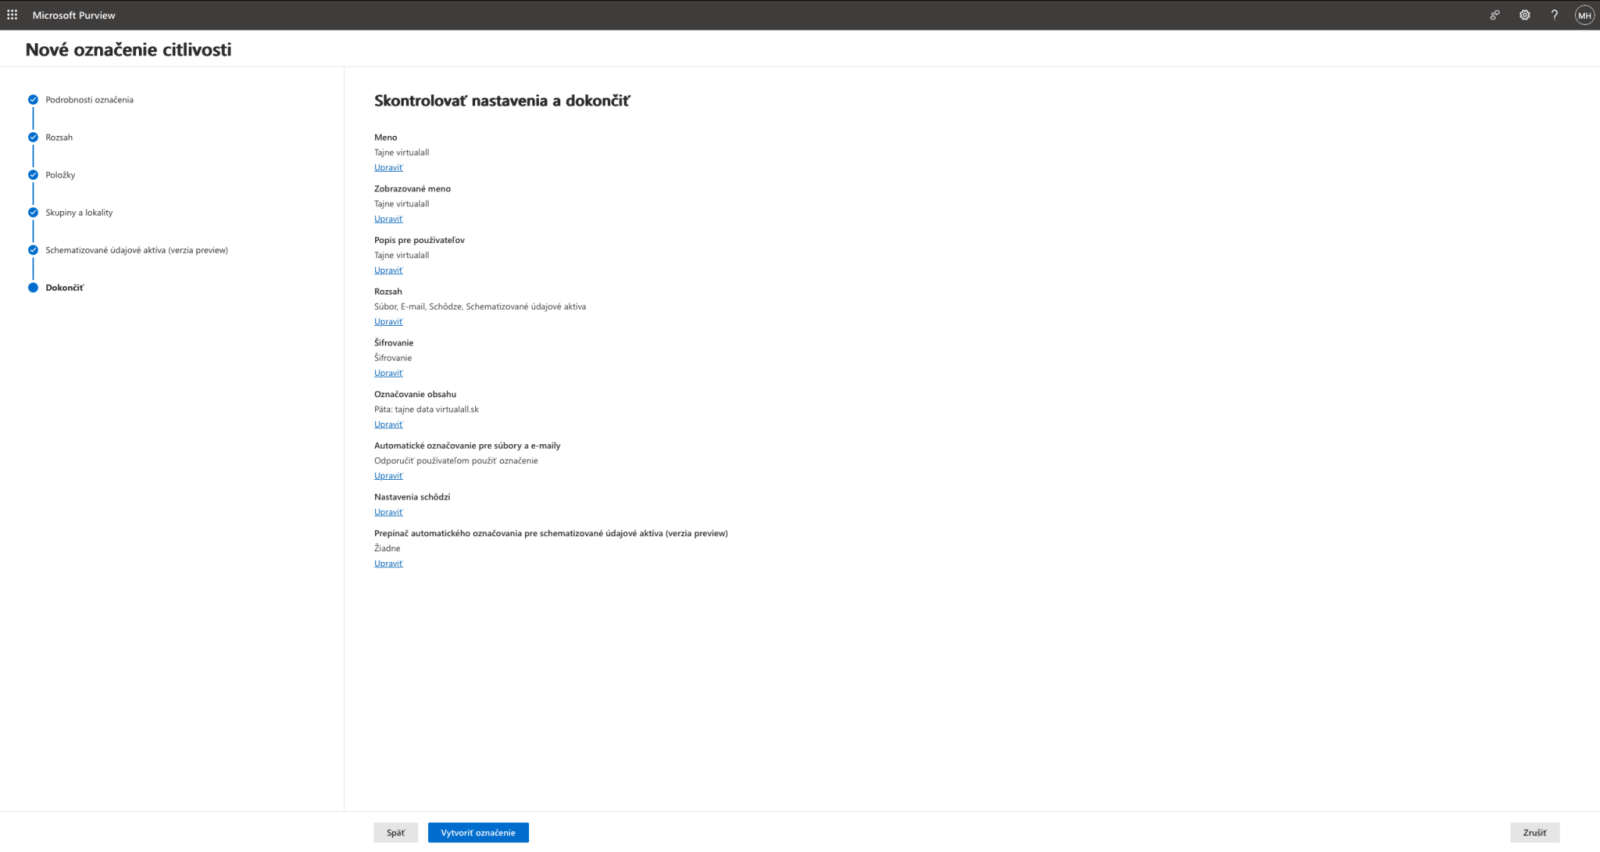
The final step is to review the settings you have configured
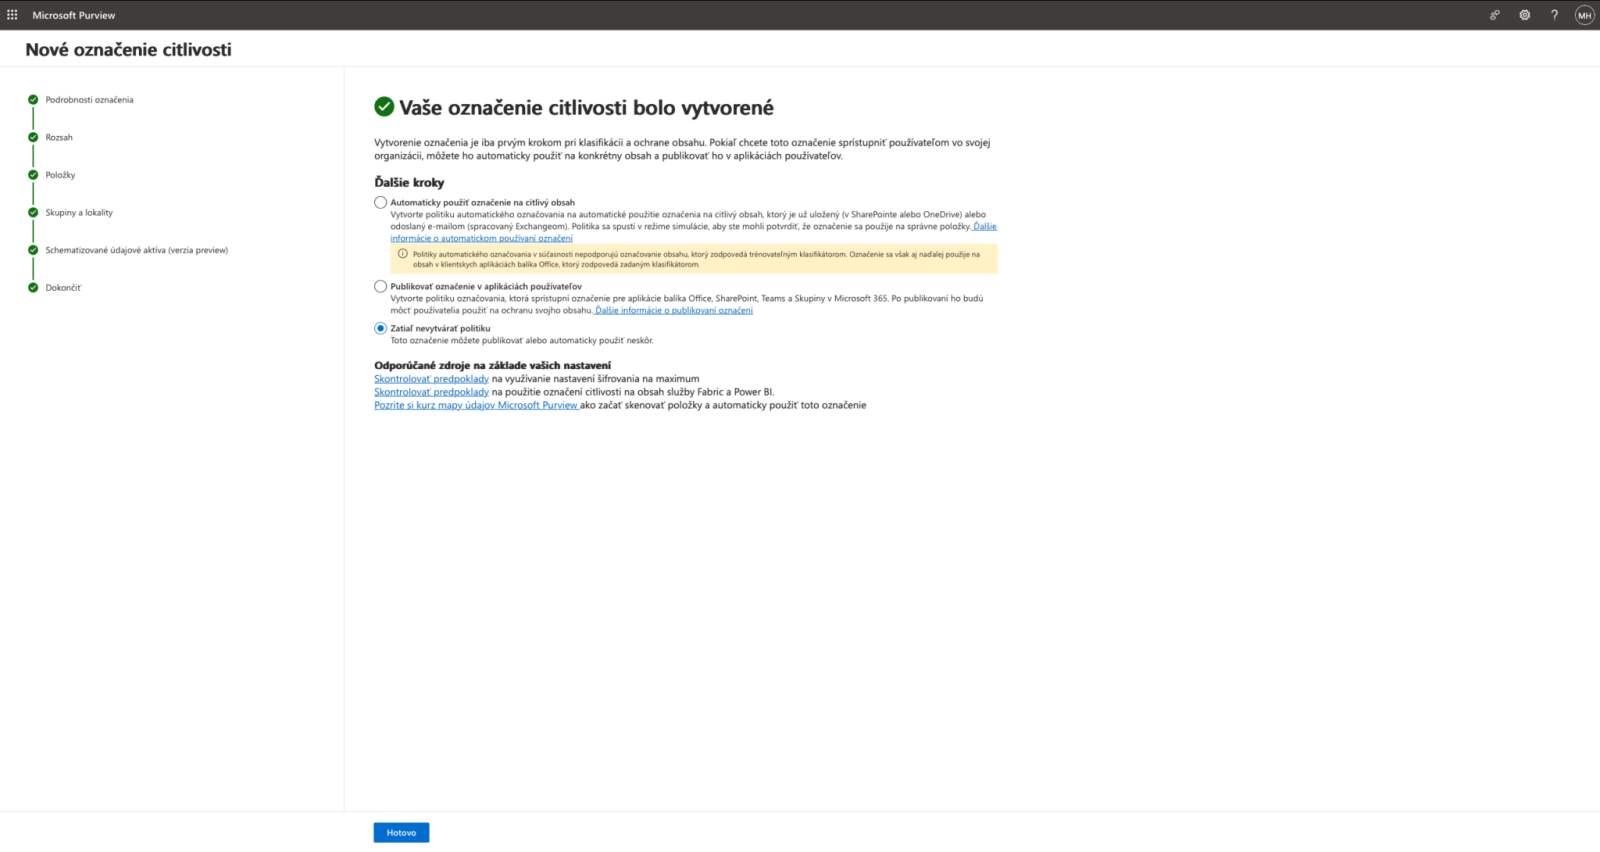
Once a label has been created, it must be published. You can also create a publishing policy at a later time.
Publishing labels
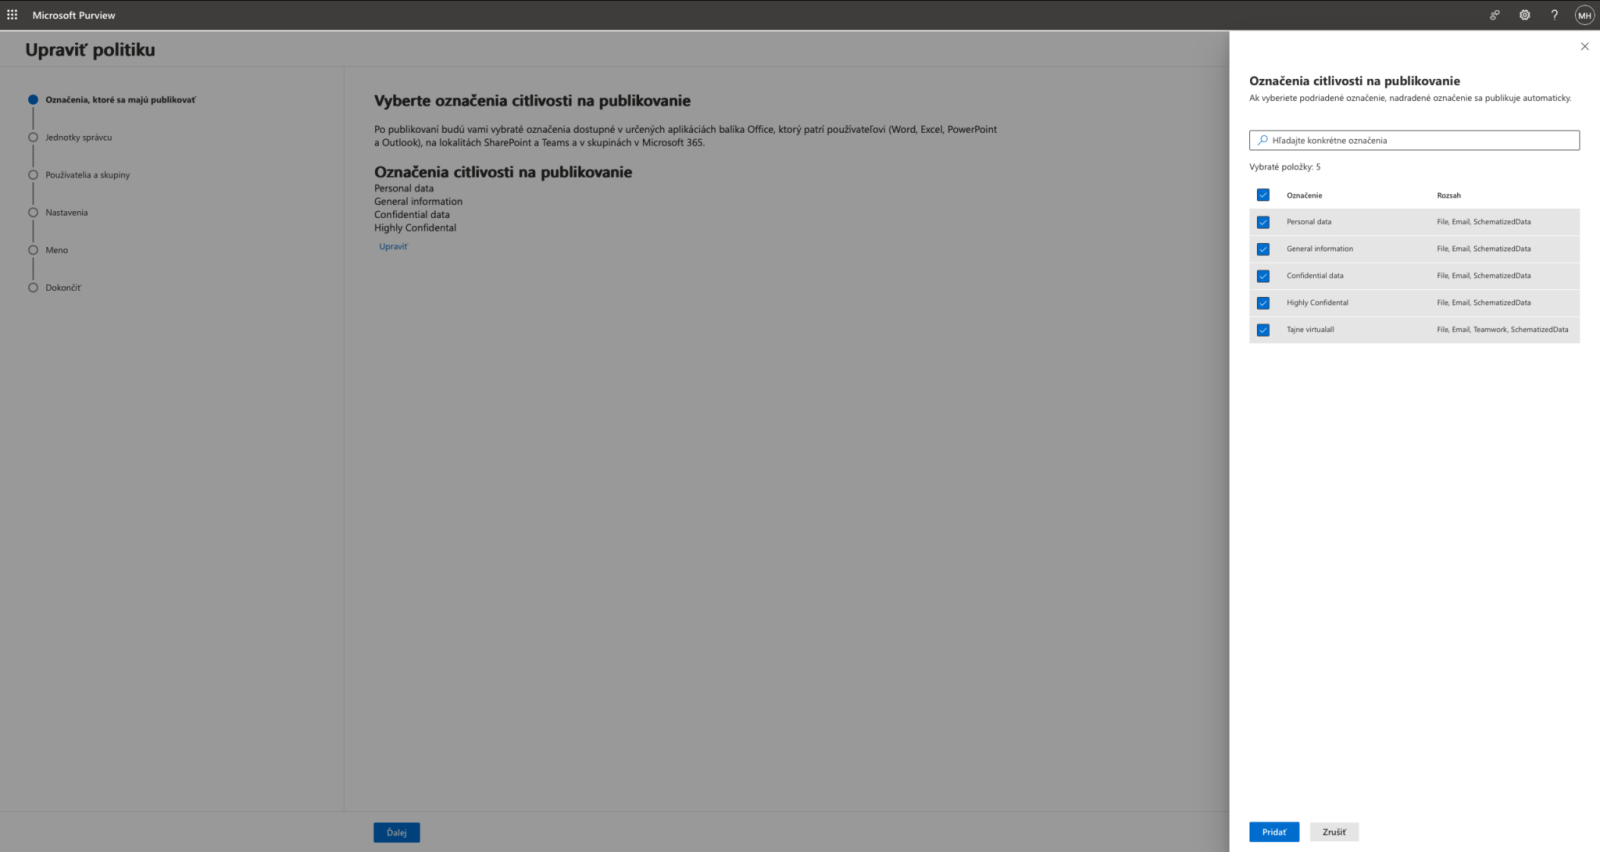
When creating a policy, you need to define which tags should be published and displayed to Office 365 users
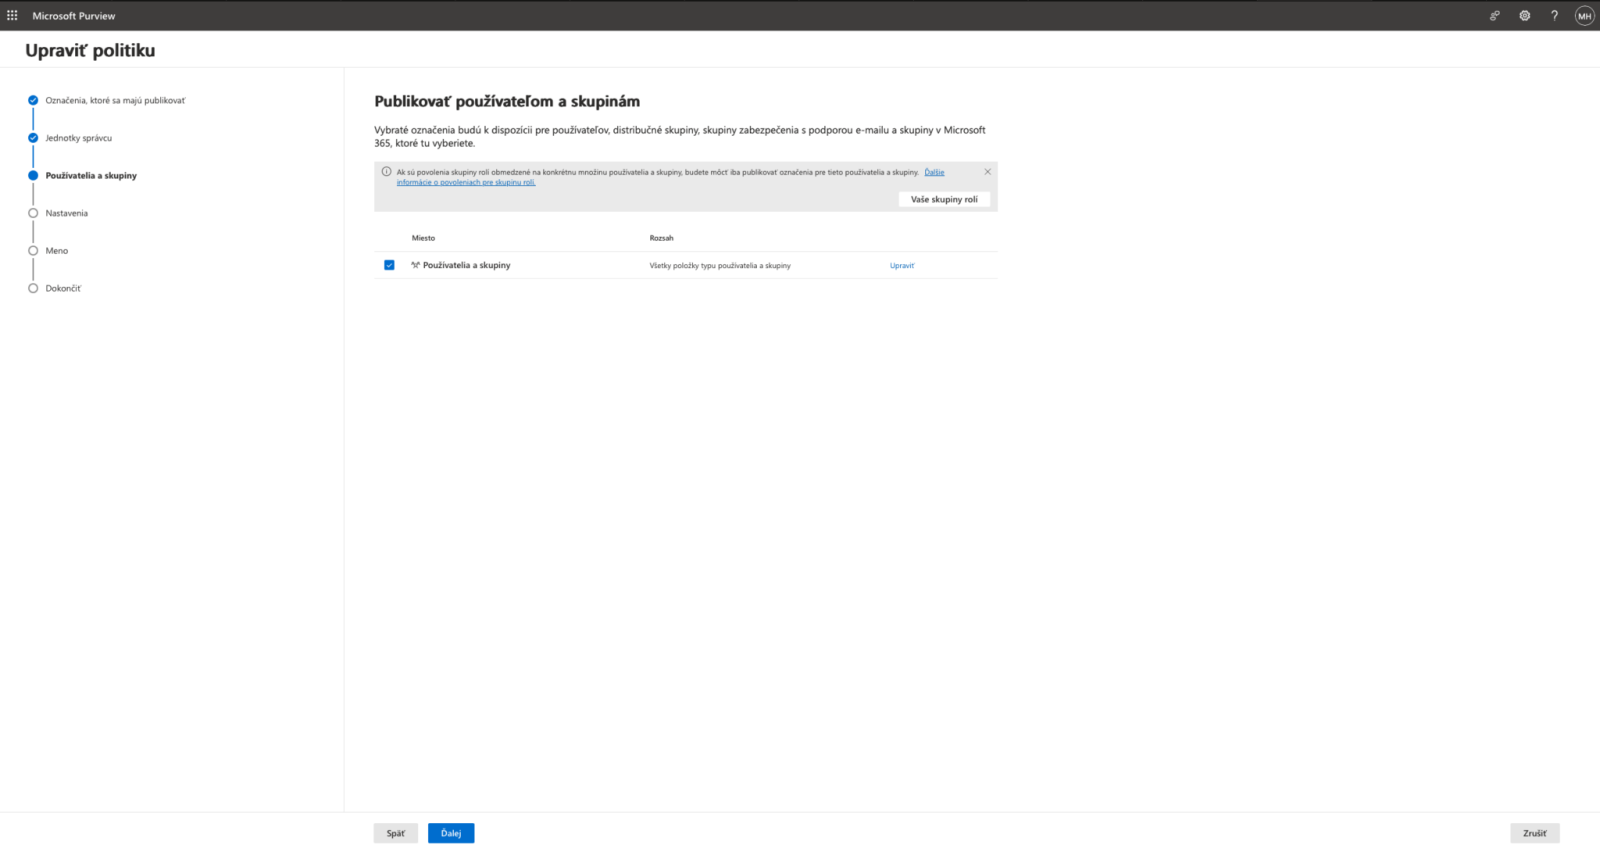
The policy can be enabled for different user groups. For default policies, it is recommended to select "Apply to all users and groups."
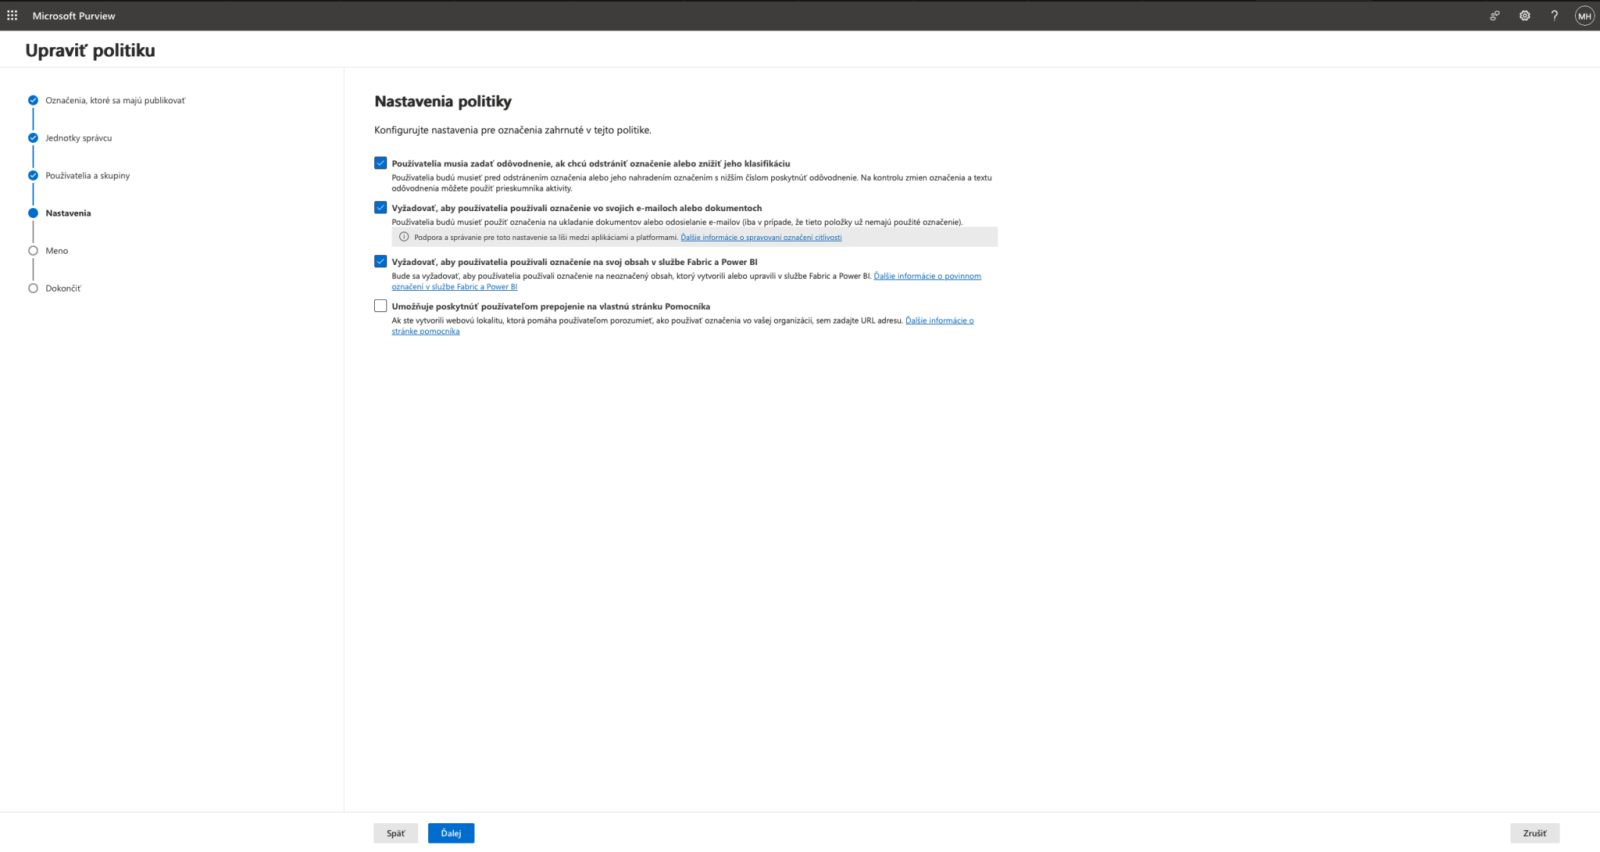
With this option, you can require users to mark files as sensitive and specify the reason for changing the sensitivity of those files.
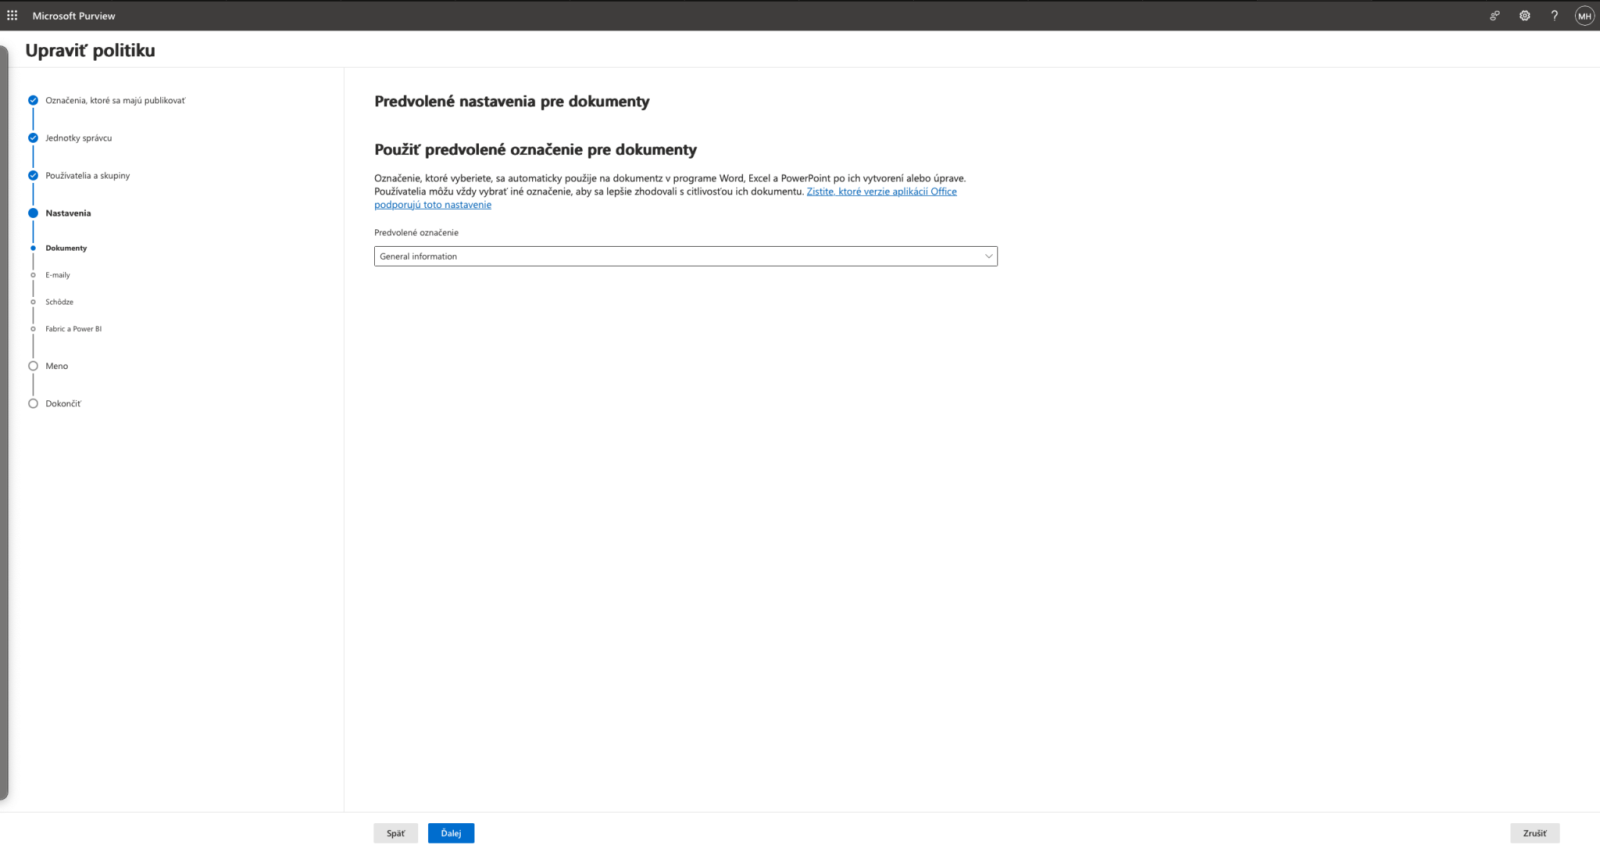
Set default policies for different file types.

Once the policy is created, the labels will appear in Office documents and emails. Changes to this policy may take up to 1 hour to take effect.
Working with labels in the Office 365 app
When using Outlook, you can define labels for every email you send:
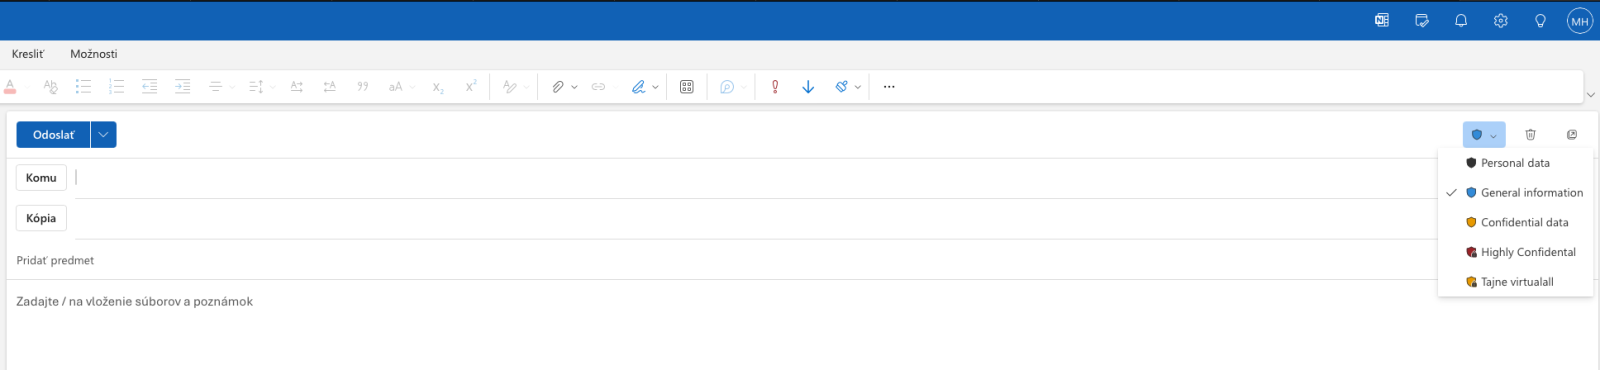
When using the Office 365 app, you can define labels in the "Sensitivity" section


When defining words to be automatically checked, the system can suggest and recommend the desired security level
You can find more technical articles, guides, and IT news on the website: www.virtualall.sk